The Food Groupie Club

Hi my name is Sarah and I'm addicted to food. I have been a chef professionally for about 12 years now and am currently teaching cooking classes at a culinary school. I seriously love to cook and eat good food. The problem with cooking and eating like the professionals though is that it can be kind of intimidating for a home food enthusiast. My goal is to bring good food into every-day homes. Anyone can make healthy, good quality, good tasting, and good looking food with the right know-how. So here you go....cooking made easy by a professional!

I will be featuring some of my favorite chef's recipes in my posts and will note in the post what book was used. Their books that I use will be listed in my must have cookbooks tab.

Thursday, July 21, 2011

Potato Gnocchi

Thomas Keller "The French Laundry" page 90

2 lb Potatoes
1 1/2 C. Flour
3 Egg Yolks
1 Tbs. Dijon Mustard
Salt and pepper to taste

Two posts in one day.... What a return! On the menu tonight was potato gnocchi (nn-yo-key).  Gnocchi's are just little potato dumplings, also known as little pillows of potato heaven.  If you can handle making mashed potatoes you can handle making these from scratch. Yes, you can find these pre-made and dried in the pasta section, but where's the fun in that??  I have tried many recipes for this and once again boyfriend TK has taken the cake here.  He has just the right proportions of potato/flour/egg yolk to make these the right consistency. You're looking for some three bear action here: not too hard, not too soft........

Step 1: Cook The Potatoes
Lets do a little potato education first before we get to the cooking here. There are different types of potatoes and each type will give you different texture results.  Russets are high in starch and will break down and get fluffy when cooked. Then you have reds which are higher in sugar than starch. Sugar helps the potatoes to hold their shape which is why reds stay firmer after being cooked.  Gnocchi recipes usually call for russets, and these work fine. I prefer using Yukon Golds. They are moderately starchy but will still have some texture after cooking. Plus they have a richer buttery-ish flavor which I love.  Your choice..... really just use which ever one you have available. You can get the Yukon's at any grocery store.

OK....to the cooking..... Leave the potatoes whole, skin on and put in a pot and cover with water. Don't forget to salt the water! The best time for potatoes to absorb salt is during the cooking process.  You can peel and cut these before cooking, but that's an unnecessary step that can be avoided.

They are done when a knife easily slides into the potato and it splits a little where the knife is.  Here is why I don't bother peeling them. The skin just rolls right off after cooking. Way easier than peeling with a vegetable peeler.  {ok..... there are a ton of chefs who may punch me for saying this, but........ If you want to cool down your potatoes faster so you can handle them to peel, rinse them for a couple minutes under cold water. Most chef's freak out at this statement because "the potatoes will absorb water and water-log".  OK, calm down. The skins are still on. If they were peeled I would agree with the no rinsing potatoes after cooking. With the skin on, the actual potato is doing no more absorbing than it does during the cooking process.  Its a time saver.  Don't cool them too much though because they need to be hot to mash nicely.}

Step 2: Mixing The Potatoes:
Throw the whole peeled potatoes into a stand mixer with the paddle attachment and mix until smooth and there are no chunks.  If you don't have a stand mixer you can use any masher you want. A hand mixer or one of those old manual hand mashers will work.  Just get them smooth!

Once they are smooth add in the egg yolks, flour, dijon {This is my own addition to this recipe. TK uses it in his pate a choux gnocchi and I love it, but for some reason doesn't use it in the potato version. It adds a nice touch, so I made the change.}, and salt & pepper. Mix until the flour and egg is combined into the potato.  Do not over mix, the potatoes can get gluey and weird. They should be stiff and stick to the beater.

Step 3: Shaping and boiling
Like I said above, these are like little potato pillows.  In classical gnocchi recipes you are supposed to take a hunk o' potato and roll it into a cylinder {like a play dough snake} and cut the snake into 1 inch long pieces, then roll it on a fork to make marks on it.  I don't know about you, but I don't care about fork marks enough to do all this.  Plus I sucked it up as a kid in the play dough snake department. My snakes always looked like they just ate several mice.  Once again.... thank you TK {he's my boyfriend for a reason} for coming up with a more practical way of doing things.  We are of course going to go non-traditional on these.  Put your potato dough into a pastry bag fitted with a round tip.  Get a large pot of water boiling and squeeze your bag until about an inch of dough comes out of the tip, then scrape it into the water with a knife.

Potatoes are heavy. They will sink upon contact with the water.  As they cook they will get light and float to the top. Once they start to float, let them cook about 1-2 more minutes before removing from the water with a slotted spoon.  Keep cutting the gnocchi into the water while they cook, just stop periodically to remove the cooked ones and place them in a single layer on a cookie sheet.


Step 4: Cooking Part Deux
Yes, this is a two part cooking process. Boiling first, then finish with a pan fry. Heat a large saute pan and melt about 3 Tbs. Butter in the pan combined with a little canola oil so the butter won't burn. It needs to get HOT HOT HOT before you add any of the gnocchi to the pan.  You need to hear it sizzling pretty loudly when you add them in.  Obviously if the pan starts billowing smoke and things are a burnin, you got it too hot. Here's that three bears thing again.  You will need to cook these in batches, they won't all fit in the pan at once. Repeat this with each batch.  Let them cook without fussing with them until they start to turn golden brown, then you can start flipping them to brown the other side. By flip I don't mean individually. Use a spatula or if you know how to do the pan flip have at it.  Remove to browned gnocchi to a separate plate.

Step 5: Finishing and eating
There are endless possibilities on what to serve these with. My fave is with roasted butternut squash and mushrooms. Tonight I kept it simple and just did some sauteed zucchini, herbs, and Parmesan cheese. 

 Add about 1-2 Tbs. butter into the same saute pan that you cooked the gnocchi in and let the butter brown slightly.....Add the zucchini {medium dice} and cook for 1 minute. These cook fast so watch out! You will need about 1-2 cups diced zucchini depending on how much you heart zucchini. 

Mix in the gnocchi and toss to combine then add a handful of Parmesan cheese and minced herbs. I used thyme and parsley, but use whatever you want. Basil, oregano, or chives would also work.  This can be served with a sauce, like a home-made marinara, but I like it with just the butter it's sauteed in.

Finished product:


Quinoa

Ok, I know I disappeared for a while..... I will confess.... I've been lazy and haven't been cooking. Ooops. Hopefully Chipotle has been happy for our business these past few weeks. I did host "Meat Fest 2011" a few weeks ago, but there was too much to do so I didn't take any pictures. It was awesome though. Yes, it's a whole festival celebrating meat. We had baby back ribs, tri-tip, chorizo hamburgers, sausage, and bacon mac n' cheese, BBQ corn on the cob, sweet potatoes, and watermelon. I love being able to bust out the smoker. Anyways,  I'm back on the cooking wagon though and we have our weekly menu planned out again, so sorry Chipotle if your sales are down this week.  

I decided to just ease back into the food blog by doing a post on Quinoa (pronounced keen-wah. You sound smarter when you say it right). 

If you haven't ever heard of this magic grain you are probably living under a rock. This has been around for-ev-er (say it like they do on 'the sandlot') but its just recently gotten a lot of media play. Quinoa is a whole grain that is a great substitute for rice. Its VERY low-carb and high in protein {and gluten free}! See, its a magic grain. It can be used and cooked just like rice as a side, filling, or stuffing.  There are a few things to know about it though otherwise you might be unpleasantly surprised, and maybe quit it before you really gave it a good chance.

#1: Don't just simply follow the package directions. The first time I tried cooking this, the package said to cook it just like rice, and said it could even be done in a steamer. I chose to try it in my rice steamer. I did not like this at all. It had very little flavor and was mushy. I seriously was wondering what all the hype was about. This package also says to basically steam it. Blegh. 
One thing you need to know about cooking, that usually if something isn't good, its not prepared properly. I learned a trick  from one of the chefs I work with that made me change my mind on this product. Toast it first. The package should say this but does not. Toasting brings out the flavor and makes it have a better texture after cooking. This is a simple task that works miracles. Just spread it out in an even layer on a cookie sheet and toast it in the oven at 350 until its golden brown and smells nutty.

#2: After toasting, put it in a mesh strainer and rinse it really good. Apparently it has a bitter coating on the outside that will go away with a good rinsing. I have a friend though that says she never rinses her's and she's never noticed any bitterness. Everything I've ever read about this says to rinse it though, so I'll stick with that. 
#3: Finally down to the cooking. I cooked this pilaf style, not steamed. I small diced 1 large red bell pepper and 1 small onion and sauteed it in a pot with about 1 Tablespoon olive oil until the onions were translucent. Then I added the quinoa and cooked that slightly in the oil (about 1 minute) and added the water. You can add a little chicken base or use chicken stock instead of water if you want a little savory undertone to it.  Cover with a lid and let it cook until the water evaporates.  The bag said to do a 2:1 ratio water to quinoa just like rice, but since it was mushy last time, I cut it down to about 1 1/2:1 and it was perfect. Side note....... This stuff expands like crazy. A little goes a long way. 1 cup will feed like 4-6 people. I used 2 cups and cooked up it fed 4 adults, 3 kids, made 3 boxed lunches for the next day and still had enough to make another meal for 3 out of it. When you buy it, the bag isn't that big so you might feel like its kindof expensive. Just remember it goes more then twice as far as rice. 

One more thing.... my friend Michele gave me a great idea for the leftovers. There was about 1 1/2 cups cooked leftovers after the 3 boxed lunches. She said to add some corn, black beans, avocado, and fresh tomato to it and serve it in a corn tortilla.  Quinoa tacos!! Genius.  They were awesome.... Plus dinner only took me about 10 minutes to make.  Great healthy meatless substitute to beef tacos. I also added some sour cream and cheddar on top.  So if you want to make your life really easy........ Cook a bunch and you can use it in a couple other meals for another day.

Thursday, June 2, 2011

Hollandaise & Broccolini


Remember I mentioned that I was just using TK as cooking inspiration? Last week I went on vacation and didn't have time to make any actual TK recipes, but he loves himself some hollandaise sauce...... So I made some to go on the broccolini I made for my Sunday dinner. YUM! So I did still cook at least 2 things last week! This post is just going to be about how amazing hollandaise is and also I want to show the proper way to cook green vegetables.  Hollandaise is considered one of the "mother sauces". Mother sauces are just sauce bases that get turned into more flavorful smaller sauces. For example a bechamel is a mother sauce where in its simple form is just milk thickened with a roux (fat and flour equal parts by weight). Kind of plain and boring. However, add aromatics: onion, and spices.... kicks it up a little. Or add cheddar, dijon mustard, and Worcestershire sauce, and you have a pretty rockin cheese sauce (small sauce) you can serve with potatoes, use for your mac n cheese sauce, or with vegetables. Or see the Mornay sauce in my chicken crepes post....also based off a bechamel.  Hollandaise is the sauce served over eggs Benedict. (Another YUM! I will for sure make that sometime and post on here about it) In its basic form its just egg yolk with melted butter. You can keep it simple and just add lemon to it to give it a nice tang for your Benedict, or go a step further and add tarragon, white wine/wine vinegar,  and shallots and you have a Bearnaise sauce that you can serve with a steak. See how awesome Mamma sauces are? Simple things end up being amazing with just a few ingredients! There are so many possibilities you can play with when dealing with sauces. They are all very versatile.  Hollandaise is an emulsion, which I already talked about in a previous post. Its in the section where I talk about the sauce.  If you have ever bought a powder mix for this sauce, learn how to make it so you will never have to buy one again. There is a powdered mix for everything. Yes its easy to just mix in water and bring to a boil and stir. However, that is never a quality product worthy of being served to anyone who eats with their taste buds. I'm all about quality. If you are going to get the calories, it might as well be worth it. Here is all you need for hollandaise:

TK recommends using 2 sticks of melted butter (8 oz) per 3 egg yolks. I didn't want to make that much so I cut the recipe in 1/2, which would give me 1 stick of butter for 1 1/2 egg yolks. Seriously 1/2 an egg yolk is nothing so I just used 2 full eggs and a stick of butter and it was perfect. My husband and I also seriously heart hollandaise, so we really poured it on. However, the 1/2 recipe will comfortably serve 3-4 people who just want a normal persons amount. If you heart it also, 1/2 recipe will feed 2.  

Most recipes call for clarified butter. Butter consists of water, fat, and milk solids. When you clarify it, all you do is cut the butter into small pieces and melt it in a sauce pot over medium to low heat. Once it melts you will notice the milk solids float to the top. You can't tell by looking at it, but the water and fat have also separated and the water sinks to the bottom and the fat floats on top of it. Skim off and discard the milk solids (this is actually what causes butter to burn when you try to saute with it because milk solids have sugar, and sugar burns). Now just put the butter in the fridge and the fat will solidify on top of the water and you can just lift the solid disk of butter fat off, and discard the water. I personally don't clarify my butter when I make hollandaise because I like the milk solids in this sauce and the water helps to slightly thin the sauce so its more saucy and not so thick. If you want it to be nice and thick and not saucy, clarify it. 

Here are the steps to making this:

#1- You will need a small sauce pot with just a little water and a metal bowl slightly larger than your pot. (you will be doing a hot water bath)  Bring the water to a simmer. Put your egg yolks into the metal bowl and wisk them over the hot water bath until thick and pale yellow like the picture below. (I like dijon mustard in my hollandaise. If you do too, whisk it into your egg yolks in this step. Just a squirt, not too much.)

Its very important that you don't actually scramble the eggs. If the bowl starts getting too hot (the yolks will start cooking on the sides) remove the bowl away from the water bath and continue whisking.  This also applies to when you are adding your butter. If it looks too hot, remove it from the heat.

#2-  SLOWLY, seriously, SLOWLY add the melted butter into the egg yolks, otherwise it will not emulsify. The butter will separate from the yolks and you will have an oil slick on top of the yolks. It should look like mayonnaise. See how thin the stream is in the picture?  Keep a thin stream! You must be whisking the entire time. If your biceps are not up to this, use an electric mixer with your whisk or beater attachments. If it does separate, just get a new bowl with another egg yolk and slowly (slower then you did before when you broke your sauce) add the broken egg and butter mix, then continue SLOWLY adding your remaining butter. Have you gotten the hint yet that you can't pour too fast otherwise you'll mess this up?

 Keep whisking in the butter until you have used all the butter. It should look like this when done:

#3-  Whisk in a little lemon juice and salt and pepper to taste. The lemon juice will also thin it out a little more. Also, slowly incorporate the lemon. Don't just dump it in.
Final product:

Now lets move on to the broccolini. Broccolini is not baby broccoli, and its not a broccoli/asparagus hybrid. You can read more about it on the food mayhem website.  I'm not the hugest broccoli fan because its just so strong and so easy to over cook. Broccolini is completely different. You should give it a try. (If it has a few yellow spots on the florettes, that's ok. They're not old or bad) I wanted to use this as a way to show the benefits of using the blanch/chill method for cooking green vegetables. If you have ever made green beans, broccoli, or asparagus you probably noticed how easily they can turn that u-g-l-y (you ain't got no alibi) drab olive green. That does not lead to an appealing "I want to eat that" color.  Green color compounds are very sensitive to heat and acid. Both will turn the vegetable olive green. Properly cooked green vegetables should be a bright vibrant green. This is where blanch/chill comes in. This is actually how restaurants cook most of their vegetables during prep time to speed up cooking time at service. But I do this even at home when I will be immediately consuming them. 

All you do is bring a pot of salted water to a boil and just cook the vegetable for 1-2 minutes to just PARTIALLY cook the vegetable. You do not want to cook it all the way. It should still be mostly hard. Then skim it out of the boiling water and immediately dunk into a bowl filled with ice water. This is called "shocking" the vegetable.
Have you ever gone hot tubbing in the winter time and get double dared to jump in the pool? You know that feeling when you hit the cold water after being in the hot jacuzzi water? Where your breath kindof gets knocked out? That's what happens to your vegetable. The "shock" really makes the green pop.  Just leave it in the water for a couple seconds. You don't want them to soak because they can water log.

Here is the before and after of raw to blanched:
Before
 After
See how much greener the after is compared to the raw? Bright and vibrant. Perfect.

To reheat you have a couple options. If you want the healthier option: Just put your chilled vegetable back into the boiling water and cook until Al Dente. (firm to the tooth) It should still have some snap to it. If its mushy ala grandma style, it is over cooked. Remove from the water and season with some salt and pepper and it is good to go.

Not so healthy option: Melt some butter in a saute pan over medium heat and warm the vegetable in the butter until Al Dente. Season with salt and pepper. 

Done. Oh wait, not done.... now you eat.

Tuesday, May 24, 2011

Crepes With Chicken & Morels

Thomas Keller Bouchon Cookbook Pages 198 & 199
Serves 4, 2 crepes each

This past week was a crazy week for me, so I was only able to get one recipe made, and I had to pick an easy and fast one to boot. But I did do 3 recipes the week prior, so technically I am right on schedule of 2 recipes per week. I think this works out though. Who doesn't like quick and easy? I chose to do savory crepes for a lot of reasons. Most people don't think dinner time when they think of crepes. Its usually associated with cheese filling with fruit for dessert. Crepes are cool because the fillings you can choose for them are limitless. The batter will be a little different for dessert vs. savory but technique is the same. Crepes are just unleavened, thin French pancakes. Unleavened just means there's nothing in it that will make it rise like yeast or baking soda or powder. Once filled, they can be shaped several ways. You can just do a 4 fold (fold in 1/2 then 1/2 again) so you end up with a triangle shape, or you can just fold in 1/2 once like a flat taco, or rolled to make a cylinder. I think the 4 fold looks best. The folding method used here is one I haven't seen before.  You just fold the 4 sides toward the center which leaves a little of the filling exposed so you can see it. I kind of like this method.


I think from start to finish this only took like 1 1/2 hours. I know its no 30 minute meal, but for a fancy meal,    1 1/2 hours is nothing.  Plus, anything that you-know-who (eeeeewwww) makes in 30 minutes is usually nasty and looks like garbage in a saute pan. Anyways..... here we go!

Step 1: Make the crepe batter

1 c. All purpose flour
1/4 tsp. Kosher salt
1/8 tsp. Fresh Ground pepper
4 Eggs
3/4 c. Milk
3/4 c. Heavy cream
----------------------------------
3 Tbs. Unsalted butter, melted
2 Tbs. Miced chives

The batter needs to be made first because it needs time to rest before using it, at least 30 minutes, no longer then a day. If you let it sit longer then that it will separate and get kind of weird.
All you do is combine all the dry ingredients in a bowl and just pour in your eggs, milk, and cream and whisk until smooth. Do not add the butter yet. It should be about the consistency of buttermilk. Remember, these are not pancakes, the batter does not need to be that thick. {see picture 1} It needs to be pourable without being watery.
After the batter has rested, you need to strain it because it will be kind of lumpy. {see picture 2 & 3} Picture 3 really shows why it needs to be strained. I have a chinois (pronounced shin-wah), which I totally could not live without. If you like making sauces, this is a must have. However they are really expensive {about $100. Thanks mom for the best b-day present ever!!}. The mesh is ridiculously fine on this so it gets every single lump out and makes the sauce super smooth. If you don't have a birthday coming up or just don't want to make this kind of splurge.... its ok to use one of those regular hand strainers.  It just won't be as pretty as what a chinois can do. Now you can whisk in your melted butter and chopped chives. Speaking of butter..... please only buy unsalted. Regular butter has salt already added because home cooks don't salt things. If a recipe calls for unsalted you must use unsalted. If you don't have it, just reduce or eliminate the salt called for in the recipe.

Step 2: Make the sauce & filling
You should make this while your batter is resting to speed things along.

Sauce:
1/2 recipe of Mornay sauce {see recipe below}
2 c. Cooked chicken*
2 Tbs. Mined tarragon
Heavy cream as needed for thinning
------------------------------------------------------
Filling:
4 Tbs. Unsalted butter
5 ounces {about 3 c.} morels or other mushrooms
12 oz. shelled beans {recipe called for fava, had to sub though. I used edemame, but you can use lima also. Also, I got stuck using frozen. couldn't find any fresh}

*You need 2 c. of shredded cooked chicken for the filling. If you have leftover chicken from a whole roasting chicken you can use that, otherwise, you need to cook some chicken. I just used 2 medium sized chicken breasts and drizzled them with olive oil, chopped herbs (whatever you have), and salt and pepper. Just bake in the oven at 350 degrees until they are cooked though. Let them cool slightly then chop it up! They don't need to be chopped perfectly, they're just getting mixed into a sauce.


This recipe uses a Mornay sauce, which is just a roux (pronounced roo) thickened cheese sauce. What's a roux you ask?  Its equal parts fat and flour used to thicken things. You've probably made one a million times without realizing it. 

Mornay Sauce (Bouchon Cookbook pg. 316)

3 Tbs. Unsalted butter
1/2 c. White or yellow onion, small dice
3 Tbs. All purpose flour
2 c. Milk
1 c. Heavy cream
1 bay leaf
3 whole cloves
1/3 c. Grated emmentaler cheese
Kosher salt and ground pepper to taste

{I only made 1/2 a recipe of this for the crepes and it was plenty}

Melt the butter in a sauce pot over moderate heat. Add onion and saute until just softened and translucent. Add the flour all at once and let it cook for about a minute while stirring constantly.  Slowly stir in the milk and cream. Then add the spices. Let simmer on low heat until thick, but will still pour from a spoon like pictured below. {This took about 20 minutes} Strain, then stir in the cheese over low heat so it melts and season to taste with salt and pepper. BTW.... you may not know what Emmentaler cheese is. It just a type of swiss cheese, but its a little firmer than regular sandwich swiss, and its flavor is more developed. I found mine at Trader Joe's for $4.80 for an 8 oz block, which is plenty o' cheese for this recipe.

Finish the sauce by adding the chopped chicken and herbs and ta da.... its done.  The recipe calls for tarragon. I do not have any growing in my garden. I went to two stores looking for it and no one had it. Sad, sad, sad.  So I just chopped up some chives and basil that I do have growing in my yard and used that instead.  Tarragon would have been better, but oh well, work with what you got.


The filling:
Lets talk mushrooms! This is supposed to have morel mushrooms, which is a wild mushroom. They are hard to find unless you plan ahead and maybe try a farmer's market or go to whole paycheck {whole foods}. I don't live close to whole paycheck so I didn't even bother trying there. You can find these dried, however I personally don't like the texture of re-hydrated mushrooms. If you use dried, you just need to soak them in boiling hot water until soft. I chose to use crimini {which are not wild mushrooms at all, they are actually baby portobello mushrooms} They are readily available and delish, so there you go. Just quarter them so you have nice chunks in your crepes. Mushrooms are also mostly water, so initially it will look like you have a ton, but they shrink considerably during cooking.
Melt the butter in a saute pan then add the mushrooms. Turn the heat up to moderate high, you should hear a nice sizzle. This sound is the water from the mushrooms hitting the pan and evaporating. I have the different cooking stages pictured below. You want to cook them until they are golden brown and you have developed a nice fond {the yummy brown goodness that forms in the pan when you saute things}. The fond will ultimately give your sauce a richer flavor. Picture 3 is how they will look when ready. Then you deglaze the pan with the brandy. {I used sherry wine because I didn't have any brandy}Deglaze is just fancy for pour the brandy into the pan and stir it while it hisses at you and soaks up all the fond. {picture 4}
Once the brandy has almost evaporated, add your beans and saute everything together until the beans are tender. This should only take a couple minutes and will look like the picture below.

Step 3: Its crepe time!!

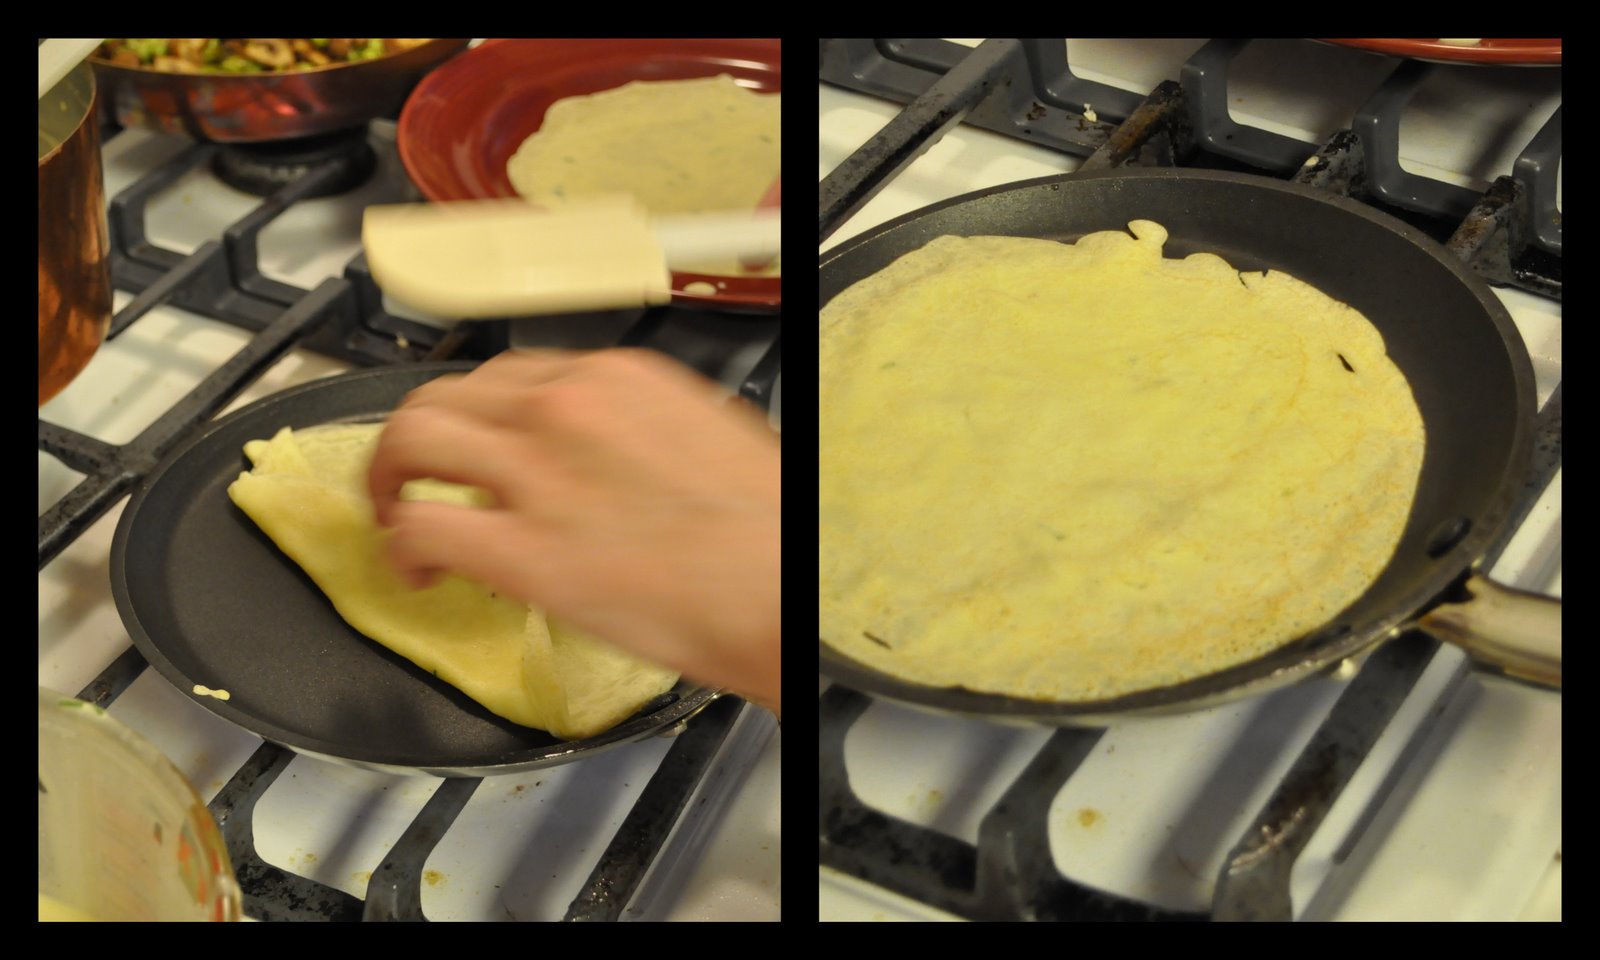
If you have a crepe pan, it makes it a little easier. However, with enough practice you can do it in a regular saute pan. I have a crepe pan of course, non stick, works great. If you are interested in eating more crepes, I would go ahead and just pick of a pan somewhere. The key here is you have to keep the batter moving by moving the pan in a circular motion to make the round shape. If you are too slow here it will start cooking and you will have a wad of cooked batter in the center of your pan.  And don't use too much batter, if they are too thick they are no good. I ended up using slightly more than 1/8 of a cup of batter per crepe.  Hopefully you can figure out what I'm doing in these pictures, this was really hard to get shots of.

You want to get the pan hot, about moderate high heat. Not on super high though because you don't want them to cook too fast or get a lot of color.  Lightly spray the pan with PAM pan spray for each crepe.  Angle the pan slightly forward and start pouring the batter from a measuring cup and rotate the pan in a circular motion so it swirls to cover the entire pan. These cook fast so you have to move faster. Warning: your first few will suck big time.  OK, your first whole lot of them will suck big time. Stick it out though and keep trying. You will get it eventually and will feel like you conquered the world when you do, or at least like you showed those crepes who's boss.  You have plenty of batter, I promise. It's ok to have some flubs.
Once you've made a nice circle you'll notice the edges will start to harden. Using a spatula, lift up the crepe from any point and give it a flip.  Let it cook for about 10 more seconds then remove the crepe from the pan. It should just slide right out onto a plate. You may need to coax it with your spatula, but it should come out pretty easy.  {look, even mine aren't perfect so don't worry if you's aren't too}

Step 4: Let's put it all together!

Finally the home stretch! Lets fill those crepes and eat. Warm your crepe pan on moderate-low heat and place a crepe in the pan. Sprinkle with a little of the emmentaler cheese and let it sit until it starts to melt.{picture 1} Once it melts, move it to your plate {picture 2} Make sure your Mornay sauce is warm and spread a little in the center of the crepe on top of the cheese, then top with the mushroom and bean mixture. {picture 3} Fold the sides of the crepe toward the center leaving a little space so you can see the filling. {picture 4}  Phew, that's it. See, quick and easy. BTW..... I spent more time blogging about this then I did actually making it.
Posted by Picasa

Wednesday, May 18, 2011

Sweet Potato Agnolotti With Curry Emulsion

Thomas Keller French Laundry Cookbook Page 78, 80


I'm going to start by addressing the elephant in the room. I know you are all thinking, "what on earth is agnolotti?"  I had never heard of it either until a few months back when I did it with one of my classes on their Keller 5 course menu day. This is a recipe that this class's regular chef  has them prepare every module. This was my first time teaching that particular class, hence my first experience with this dish. Even though I have made it before, I still wanted to showcase this in my first posting because its so genius. Gotta love the Italians for being pasta genius's! Its basically the Piedmont version of regular ravioli.  I hate making home made ravioli. Its hard to get everything evenly spaced, then you have to mess with egg wash, then line up two perfectly shaped pieces of pasta sheets, and press it all together then finally cut them. Too much work. Too inconsistent in shape and size. Hate the air pockets.  Too messy.  This is a much easier and faster method that will make you wonder why they even still make ravioli. These also freeze well so you can make a bunch and freeze them for future dinners.   If you do decide to tackle this recipe, you have to make your own pasta dough. Its not hard at all, and only takes a few ingredients.  You must have a pasta machine though. The pasta sheets you will be making for this have to be super thin, which you will not be able to accomplish by hand. You should have a pasta machine anyways. Once again, keep your eyes peeled at the discount kitchen stores and you can usually find one for under $20. You'll spend more than that on one crummy meal at The Olive Garden. 

Step 1: Make the dough

1 3/4 c. All purpose flour
6 Large egg yolks
1 Large egg
1 1/2 tsp. Olive Oil
1 Tbs. Milk

The dough that T.K. uses is a high ratio egg yolk dough. Most pasta dough recipes I have used before only have a couple eggs. This has 6 yolks + 1 whole egg. This makes the dough a lot softer and richer. I will never go back to another dough recipe again. You can also make this ahead of time and as long as it stays wrapped tight, it can keep for a couple days.  I also like that he incorporates extra virgin olive oil in this dough. It gives it a really nice flavor. He doesn't include any salt though. I thought it needed a little. I would add just a pinch or two just to give it a little more flavor.  All you need to do to make the dough is pile the flour on a cutting board and make a well in the center. I however like to use a bowl for this. Its less messy and I feel like I have more control of the ingredients. Do whatever makes you happy.  Then just put all the wet ingredients (eggs, oil, milk) right into that well. I like making pasta because you get to get your hands dirty. Don't use a spoon. Nothing can beat the God given tools here that are connected to your arms. With your four fingers just swirl the wet ingredients around so it grabs the flour from the sides.


Once all the eggs and flour are incorporated it will look like the picture on the left.  Now you just turn this out onto a floured cutting board and knead it F-O-R-E-V-E-R. 
T.K recommends hand kneading it for 15 minutes. He actually says "even if you think you are done kneading, knead it for an extra 10 minutes".  I will admit.... this is painful. I vote if you have a kitchen aid with a dough arm, throw it in there. Unless you're shooting for one freakishly large bicep on one side, the mixer is your better bet. He is telling the truth though when he says you cannot over mix this dough. You can however undermix it, so make sure you go the full time.  It should be smooth and silky like the picture on the right when it is done being kneaded. Wrap it tight and LET IT REST! Resting is so important. Let it go at least an hour. Skip this step and you'll be sorry. If you have ever worked with regular bread dough and seen it stretch and retract when it isn't rested properly, it will do the same thing here. Let it get nice and soft and squishy.
Step 2: Its sauce time!

2 tsp. Curry Powder
2 Tbs. Chopped green onions
3/4 c + 2 Tbs. stock (vegetable or chicken) or water
1/4 c. Heavy cream
1/4 c. Creme Fraiche
8 Tbs. Unsalted butter, but into chunks
Kosher salt and fresh ground pepper to taste

The curry emulsion sauce was easier than I thought it would be. This would be good on a lot of different things actually.  In case you don't know what an emulsion is......you guessed it, I will tell you.  I totally have to go all Bill Nye the science guy on you though.  Its a uniformly combined mixture of two or more liquids.  Vinaigrette's are an example of a temporary emulsion. The oil and vinegar will stay blended together as long as the fat particles are small enough to suspend in the liquid. That is why we shake or whisk them. The shaking breaks up the fat particles. However, they will separate back out once the fat particles gather back together and get too heavy again causing them to sink. Permanent emulsions, like mayonnaise, are held together with an emulsifying agent (egg yolks). The proteins in the egg yolks hold everything together which is why we don't have to give our mayo a shake shake every time you use it. phew. I'm now exiting Bill Nye mode.....

I once again did not have creme fraiche in hand so I subbed it with sour cream thinned out with water. You first toast the curry in a sauce pot. Toasting does something magical to everything. Its a great way to bring out flavor in food. Once you can smell the curry, add the green onions to it and saute for just a minute. Then just add cream, creme fraiche, and the water or stock and let it simmer until thick like in the picture on the left.  Creme fraiche is super cool because you can cook with it and it doesn't curdle like sour cream does. If you missed my post about creme fraiche you can read about it again here on the Joy of Baking website.  If you use sour cream instead of the creme fraiche, do NOT add it in at this point, it will curdle.  Add it after you remove the sauce from the heat.  Anyways, once the sauce is thick as pictured, you swirl in you butter (heat should be OFF at this point) and just stir it until the butter melts and incorporates into the sauce. Now you can add the sour cream if you are using it as a sub.  At this point just pour it into the blender and turn it on.  It will look like the picture on the right after its blended. If you aren't a curry fan, I think you will still like this. Its not an over powering curry like in most Indian dishes. It just really gives it a nice heat in your throat. If the sauce is too thick after removing it from the blender, you can thin it our with a little more hot water or stock. That's it. Oh and season with salt and pepper.

I actually ended up not being able to finish this dish in one day, so I had to fridge the sauce and save it for the next day when I finished the agnolotti's.  It got thicker in the fridge, but when I was ready to coat my cooked pasta in it, I just poured it out into the saute pan with the pasta and added a little of the pasta water to it to make it the consistency I wanted.
Step 3: Making the agnolotti

This is where is gets awesomely easy.  Seriously, if you love fresh ravioli but hate making them, you are going to fall in love today.
 
Part 1: The filling

2 pounds Sweet potatoes (The original recipe calls for fava beans. I couldn't get any so I subbed the sweet potatoes)
3/4 c. panko bread crumbs
1/3 c. Mascarpone cheese

  You can use ANY filling you want. The French Laundry book gives several suggestions. Basically as long as its soft you can use it. T.K. gives the example that you can't use whole shrimp but you can use shrimp mousse.  This curry emulsion recipe actually originally called for pureed fava beans for the filling. My vegetable stand no longer has them. (super bummed about this) I had to make a quick substitution and I chose to make a sweet potato filling.  I decided to oven roast my sweet potatoes as the cooking method because I like the flavor this way over boiling. Let me say this: Sweet holy Moses it takes forever to roast sweet potatoes!  I just put the whole sweet potatoes in a foil pouch with some butter and roasted them at 350 degrees and a whoppin' 3 hours later they were finally ready! You want them to get super soft though so they mash easily. Oh, sweet potatoes and yams..... not the same thing! The texture is way different. Yams are more stringy in texture after cooking. Not a fan using them as a filling in things. So I spent an eternity roasting the sweet potatoes. When they were finally done, I just peeled them while they were hot (the skin pulls right off) and then mashed them up really good and mixed in mascarpone cheese (similar to cream cheese but not as sweet) and salt and pepper.  Filling done.

 Part 2: Fill the angolotti

Its finally time to bust out the pasta machine! Break the dough into small pieces maybe the size of the palm of your hand. I have tiny hands. If yours are big, do maybe your inner palm size. Hopefully you get the idea.  Pass it through your machine starting on setting 1. Keep passing the sheet through adjusting the rollers 1 setting up at a time until you reach setting 7. You should be able to see your fingers through the dough.  If the ends get pointy and weird (not square) just fold the points in on itself before one of the passes. You want the final sheet to be even in width. If there is a little point on the end, you can just square it off with your pastry cutter. You need the length to fit on a cutting board if you don't have solid counter tops (not tile).  If you do have solid ones, you can just do this right on your counter top and you don't need to worry about the length. If you are using a cutting board just cut the strip in half to fit the board. Only roll out and fill one sheet at a time otherwise the dough may dry out because its so thin.

Using a fluted edge pastry roller, trim the edges on all sides so the edges are pretty.  Lay the pasta sheet on a well floured surface and pipe the filling from a pastry bag fitted with a large round tip in a straight line the full length of the sheet.  Pipe along the bottom edge leaving about an inch space from the bottom and sides like in the pictures below.
Roll the 1 inch  exposed edge of pasta over the filling and press down to seal.
Using your index finger and thumb pinch the pasta and filling leaving about 1 inch between pinches. This will form the individual agnolotti.  This dough ends up self sealing, with is why an egg wash is completely unnecessary in any of the steps.
Lastly, using your fluted pastry roller, cut the individual pieces buy rolling through the center of each pinch. Make sure its centered in the pinch so you don't cut through the filling. Once again, make sure you have plenty of flour on the board, otherwise they stick and will be hard to remove from the board.
Step 4: Cook and serve

If you are planning on cooking these immediately get a pot of salted water boiling before you start shaping the agnolotti. Water must be rapidly boiling before you add your pasta to it. I just want to add in a quick pasta cooking note.  You do not need to add any type of olive oil to the water when you cook pasta to "prevent sticking".  {I know a bunch of the food network chef's say to do it, but they are stupid [ ah hem.... Rachel Ray]  and I think are in a conspiracy with the olive oil industry. } Oil and water do not combine. That is fact.  As long as the pasta is wet, oil will not cling to it to prevent any type of sticking during the cooking process.  Making sure the water is rapidly boiling will help though.  The bubbles keep the pasta moving which keeps them from sticking.  So save your oil and stop doing this if you currently do.  

Drop the agnolotti into the boiling water and let them cook until they float to the top. This takes about 1 minute to happen. Let them cook about and additional 1-2 minutes before removing with a slotted spoon or a strainer like I did below. Pasta should whitish in color and be al dente { which means not mushy, but firm to the tooth. } Just break a little edge off of the tail of one of the pieces and taste it. If you are unsure what you are looking for texturally, stick to the 1-2 minute cooking time suggested above. You'll be fine.
Finally, in a large saute pan slightly warm your sauce and drop the hot cooked pasta straight into the sauce. Just toss to coat and you're ready to eat.  One thing that is cool about this weirdly shaped heavenly pillow is that there are more nooks and crannies for the sauce to hide in so it gets a better saucing then regular ravioli and has a better pasta to filling ratio.
Posted by Picasa

Sunday, May 15, 2011

Strawberry Sorbet Shortcakes With Sweetened Creme Fraiche Sauce


Thomas Keller The French Laundry Cookbook Page 274

If you love strawberry shortcake, you need to try this. Its a different take on the old classic, but I like it better. The original just calls for tossing strawberries in sugar and piling it on top of a biscuit then topping with whipped cream. This pulls a frozen component into it and the creme fraiche sauce makes it feel a little more grown up.  It makes shortcake more sophisticated.

Step 1: Make the Sorbet
The recipe for this is included in the text

You will need an ice cream maker for this one to make it easy. If you don't have one, you can just use 2 metal bowls (1 large & 1 medium). Fill the larger one with a lot of ice and ice cream salt. Put the sorbet mix in the smaller bowl and push the bowl down into the ice mixture. Just hold a spatula in the mixture and spin the bowl, this imitates the churning. I do this all the time at school because we have 20 students per class and only 1 ice cream machine. We have to get creative on ice cream week. I have the ice cream bowl attachment for my kitchen aid mixer. I love it because I just keep it in the freezer until I'm ready to use it and I don't have to have an extra appliance taking up space in my kitchen. It works great.  The Sorbet was SO STINKIN' EASY to make. Are you ready for me to blow your mind on this one? Take 2 1/2 pounds of strawberries (about 3.5 pint baskets) and cram it into your blender with 1 c of sugar and puree until smooth. T.K. says to strain it, he's a big strainer. I like things to have texture occasionally, so I leave it as is with the seeds. It feels more like eating a strawberry. Then add 1/4 cup of honey and a pinch of kosher salt. I strayed from T.K.'s recipe and added the zest from 1 lemon. Lemon and strawberry...... can't go wrong on that. Then freeze it in the ice cream machine until thick like soft serve. Pour it into a bowl and let it freeze in your freezer until its thick enough to scoop and hold a shape. See, SO STINKIN' EASY right? Speaking of strawberries....... we are in the peak of strawberries. GET THEM FROM THE FARMER'S STANDS! My favorite stand is the one by Honda North on Herndon between Willow and Peach. The flavor will knock your socks off.

Step 2: Make the shortcakes

1 1/2 c. All purpose flour
1/2 tsp. Kosher salt
1 1/2 tsp. Baking powder
1/4 tsp. Baking soda
4 Tbs. Cold unsalted butter, cut into chunks
1/2 c. Buttermilk
2 Tbs. Milk

Basic buttermilk biscuits. No big mystery or secret here. Combine all the dry ingredients in a bowl, then rub the cold butter into it with your fingertips until it resembles small peas in size. Add the milks, and stir just to combine. Once combined, stop mixing, otherwise the dough can get tough.  This recipe didn't puff up very much. Not sure if I did something wrong or not, but actually it ended up being just enough biscuit in the end. Even if they are thin, do not be tempted to just use 2 biscuits (one for the top, one on the bottom) Split one biscuit. I promise, its enough. Oh I do have a tip. Roll the dough out between 2 pieces of parchment paper if you have it. Less messy.
Step 3: Creme Fraiche Sauce

3/4 c. Creme fraiche
1 1/2 Tbs. Powder sugar (or to taste)
1 tsp. Vanilla bean paste or vanilla extract

I didn't think a picture was necessary on this one as it was just whisking 3 ingredients together in a bowl.  The recipe calls for creme fraiche. This is a french version of sour cream. It more closely resembles thick cream though. If you have seen it in the store its about $7 for what I think is only a 1/2 pint container. Its ridiculous. You can make it yourself if you plan ahead. All you do is warm heavy cream to about 100 degrees. Should just be warm. Add a little buttermilk to it and let it sit in a bowl at room temperature overnight. It will thicken from the cultures in the buttermilk. Once thick, store it in the fridge. You can read more about creme fraiche and see the recipe on the joy of baking  website. If you just want to do a quick substitute you can just use sour cream thinned out with a little milk. Let me be clear: it is not the same thing, just an adequate substitute. I used sour cream in this recipe.  All you do for this sauce is whisk together creme fraiche (or sour cream), vanilla, and powdered sugar to taste. If you use sour cream you will need to thin it out with a little milk until saucy and pourable. That's all there is to this simple little sauce. 

If you like dipping your strawberries in sour cream, you'll love this. If you have never dipped your strawberries in sour cream, you should start. Mix a little brown sugar into the sour cream though, makes it better.

Step 4: Assemble

Small dice about 3/4-1 cup of fresh strawberries. Will use in assembly in step 4.
  1. Cut biscuit in half
  2. Pour a little of the sauce in the center of the plate to make a circle shaped puddle. Place the biscuit bottom on top of the sauce.
  3. Cut up fresh strawberries into small dice (if they aren't sweet enough you may need to toss them in a little sugar. If you are using the farmer's stand strawberries you probably won't need any extra sugar.) Put a small scoop of the diced strawberries on top of the biscuit
  4. Place a scoop of sorbet on top of the strawberries (can use an ice cream scoop or make a quenelle out of two spoons. Click here to see a demonstration. I prefer the quenelle because its a lot more appropriate for fancier desserts. Ice cream scoops are too casual and won't fit as nicely in between the biscuits.
  5. Place top of biscuit on top of sorbet. Sprinkle powdered sugar over biscuit.
  6. Last step, probably the hardest. Devour it!
Posted by Picasa

Heirloom Tomato Tart w/ Nicoise olive Tapanade, Mixed Field Greens, & Basil Vinaigrette

 Thomas Keller The French Laundry Cookbook Page 66.  

Before we start..... if you have ANY questions or want me to explain something for you please leave a comment and I will respond.


This was probably one of the coolest looking, high depth flavor profile, and EASIEST salads ever. I know he called it a tart. I looked up some pictures online and saw many different presentations of this. In the book T.K. says this is his interpretation of fancy pizza that meets the standards of The French Laundry name. I did see many pictures of this looking like a pizza. However, I know T.K.'s style, and the way I ended up doing it is by all means a style I have seen on many of his salads. There are many components for this salad, but don't let that overwhelm you. With the exception of roasting the tomatoes, everything else literally took seconds to make. I loved the flavor and texture profile of this dish. The olive and the basil with the tomatoes was a great combo.  All flavors compliment and enhance each other and will definitely get your palate excited.

Step 1: Picking your tomatoes
Buy good quality tomatoes. This recipe calls for heirlooms. When in season, these are the best tomatoes out there. They come in so many different colors which I feel really adds to the eye appeal of any dish they are used in. Trader Joe's is my go-to place for things like this. I got about 6 tomatoes for $4.99. Whole foods is probably your other option, but I lovingly call them whole paycheck. Cool store. Way unnecessarily overpriced. I love the Joe's because you can get cool things and they are way more affordable. If you can't find heirlooms, just get regular beef steak style red tomatoes. Very important that this is made only when tomatoes are in season during the spring and summer months. Winter tomatoes are terrible.


Step 2: Preparing the tomatoes
This recipe includes 2 different styles of tomatoes. Half are roasted and half are cold raw. This really gave some variety to the texture and there is a huge difference in flavor when something is roasted.  Cut the tomatoes you will be roasting a little thicker (about a 1/2 inch) than the raw ones (about 1/4 inch)  as they will shrink slightly during roasting.  All I did with the roasted tomatoes is lay them on a baking sheet lined with parchment paper or if you have a silpat sheet you can use that.  Silpat's are just silicone baking sheets. I love them. If you buy one from one of the fancy kitchen stores they can get kind of pricy. Keep your eyes peeled at places like Home Goods or Ross and you sometimes get lucky and can find one for a fraction of the cost. Sprinkle a little kosher salt, fresh cracked pepper, extra virgin olive oil, and minced oregano on the tomatoes. The recipe called for thyme. I have oregano growing like crazy in my yard and my thyme hasn't really sprouted yet. Its ok to substitute with what you have when its a comparable sub. They're both Italian herbs, they both go well with tomatoes, so I say that's comparable. Cut enough tomatoes so you have 2 roasted and 2 raw per serving. Roast at 250...recipe says 45 mins to 1 hour. I ended up letting mine cook for about 1 hour 15 minutes.
Pre-Roast:
Post-Roast
After cutting the raw tomatoes, lay them on a napkin to drain excess moisture. All these need is a little Kosher salt and pepper, and place them in the fridge until you need them. These should go in the fridge the same time the other ones go in the oven.
Step 3: Make the "crouton"
The crouton (or pizza crust depending on how you visualize this) is made of puff pastry. You can make puff pastry if you have a ton of time on your hands and are up for the challenge. Remember, I have a full time job. I bought it. You'll find this in the freezer section. Quality is fine, so don't feel bad that you are taking a short cut.  The sheet will be folded so you'll want to let it thaw slightly before you try to open it, otherwise it will break at its seams. You want it to only thaw slightly. If you let it get too soft it will be hard to work with and smash on itself.  You will need to cut this into circles with a cookie cutter about the size of the tomatoes you used (probably about 3 inches) then prick it with a fork like when you blind bake a pie crust. This will prevent it from puffing up too much. I didn't roll it out at all before cutting and it puffed up too much. You want this to stay kind of flat. Roll it out just a little so its about 1/4 inch thick. Just bake the rounds on a cookie sheet at 400 until they are golden brown and cooked through. Look at the layers to make sure they aren't raw. Just because it's golden brown doesn't mean its cooked.  If it is still too puffy, push down in it while its hot to collapse some of the layers.

Step 4: Make the Tapenade

6-8 anchovy fillets, soaked in milk for 1 hour then rinsed. (can omit if you don't like anchovies)
1/2 c. pitted nicoise olives
1/4 tsp. Dijon Mustard
1/4 c. extra virgin olive oil (may not need all of it)

If you have ever purchased tapenade you got ripped off. If you have a food processor this will actually take less then a minute to make.  All tapenade is is blended olives with olive oil. That's it. The recipe called for Nicoise olives. I couldn't find any. You can really use any olive you want. So just use your favorite. I wouldn't use Kalamata olives for this particular recipe though becuase they are way too strong. Eww and also don't use the ones stuffed with pimento. Since these will be pureed it will not be good.  I just found some cured black olives (way different then the canned black ones!) at Savemart's olive bar.  Once again whole foods also has a rocking olive bar, but.... you know. These had the pit in, but olives are super easy to pit especially if you have a pitting tool. If not, just squeeze it out with your fingers.
Just put ALL of the ingredients straight into a food processor and blend! Its that easy.  For this one all it had in it was olives, Dijon mustard, and just enough olive oil to moisten and hold it together as a paste. T.K. also included anchovies in his. Once again, recipes were written to be ignored. I hate anchovies. If you don't like something, you leave it out.
Step 3: Make the vinaigrette. 


1/2 c. Packed basil leaves
1/2 c. Extra virgin olive oil
3 Tbs. Balsamic vinegar
Kosher salt and pepper to taste

Baby green mix as needed


I didn't take pictures of this one. Ooops. Just like the tapenade though....easy. Just add basil to your food processor and slowly incorporate extra virgin olive oil until it is dressing consistency with the basil thoroughly mixed in. Add balsamic vinegar to taste right before serving. (and season of course!)

Side note: Regular food processors are way too big and don't puree well unless it is at least 1/4-1/2 full. I have a mini food chopper that I like to use for little projects like the tapenade and the dressing.

Step 4: Assemble
Smear a little of the tapenade on the center of the plate to "glue" the crouton so it doesn't slide around the plate. Crouton goes down first,  smear a little tapenade on the top of the crouton. Then do a roasted tomato, raw tomato, and smear tapenade on top of the raw tomato. Do one more layer of roasted, raw, tapenade. Should have 2 each of roasted and raw total.
Lastly, in a small bowl, add the greens (I used the herb spring mix from Trader Joe's) with just enough of the vinaigrette to lightly coat the greens. Do not over dress. If you have a puddle of dressing in the bottom of your bowl, its overdressed. place a small pinch of green on top of your tomato and drizzle a little more dressing on the plate to garnish. 
Posted by Picasa